Garden statues pick up plenty of character from sun, wind, and wandering vines, but there comes a point when “weathered” crosses over to “worse for wear.” Restoring an old garden statue can be a satisfying project if you enjoy rolling up your sleeves and seeing a forgotten piece come back to life. I’ve spent time bringing old concrete gnomes, stone fountains, and even metal birdbaths back to their former charm. Here’s the inside scoop on what it’s really like to restore these quirky outdoor treasures.
What Motivates People to Restore Garden Statues?
The first thing I always notice when chatting with other restoration fans: there’s a strong emotional tie to the statues we bring back. For some, it’s about sentimental value—a beloved angel statue from a grandparent’s garden or a quirky frog that’s been in the family for decades. For others, it’s the joy of saving something unique from the landfill and giving it new purpose.
I met one gardener, Angela, who restored a weather-beaten cherub fountain that had been the centerpiece of her parents’ yard. She told me, “It’s more than decoration. When it’s clean and standing tall, I feel like I’m reconnecting with happy childhood summers.” That sense of preserving a little family history is hard to beat. And honestly, it feels pretty good to give a forgotten piece a makeover that makes the whole backyard pop again.
Beyond the sentimental, restoring garden statues is a fun way to flex your creative muscles. Some folks love experimenting with color palettes, while others enjoy researching the background of antique statues—a bit like garden archaeology. Sharing your finished work on social media or with neighbors can spark conversations, swap tips, and build a little community around outdoor projects, too.
Basics of Garden Statue Restoration: What’s Involved and What You’ll Need
Restoring a garden statue usually starts with a simple inspection and a bit of detective work. Before jumping in, I like to figure out what the statue is made of—concrete, stone, metal, resin, or terra cotta. Each material calls for a different approach and its own set of tools.
- Thorough Inspection: Look for cracks, chips, mossy buildup, chipped paint, and rust. Catching hidden damage early makes the whole process smoother.
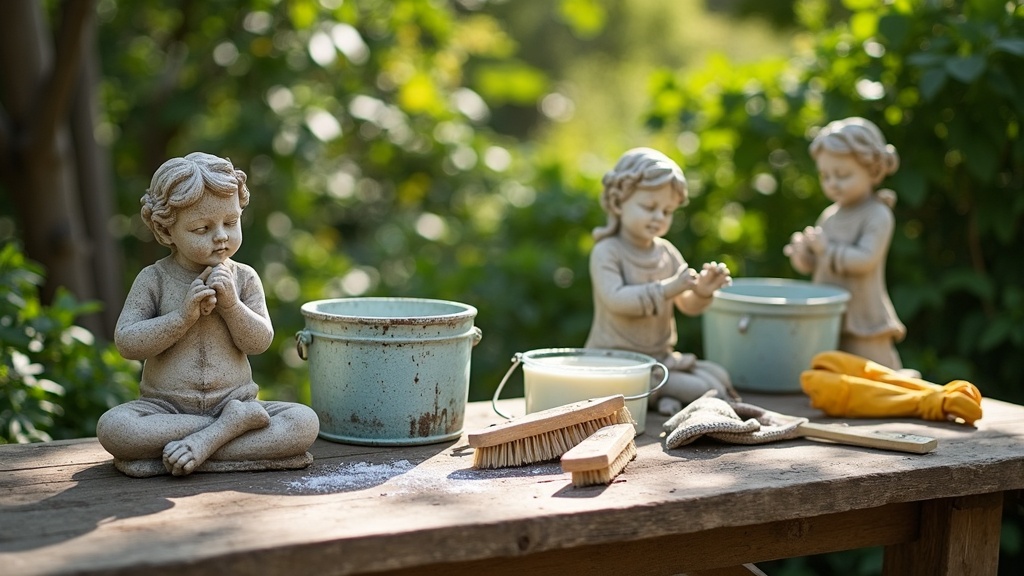
- Mild Cleaning: Most statues need a good scrub before anything else. Common supplies include soft brushes, clean sponges, garden hose, and gentle cleaners.
- Repairs: Filling cracks, patching broken areas, or sanding down rough edges come next. Sometimes I find creative solutions, like using waterproof epoxy for stone or special concrete filler for heavy pieces.
- Touch-Ups: For painted statues, a fresh coat brings back bright colors. For metal statues, a bit of rust removal and repainting protects them for outdoor life.
- Sealing: A weatherproof sealer or protective wax helps keep the elements at bay longer after the work is done.
Each step has its tricky bits, but it’s also where you get to see slow, steady progress—a nice reward for anyone who enjoys hands-on projects and visible results. Working outdoors also means contending with changes in weather and daylight, so timing repairs and painting when the forecast is dry can really help your efforts last longer.
Best Cleaners to Use on Yard Statues
The right cleaner depends on what your statue is made of (and how much grime you’re dealing with). Here are my go-to picks organized by material:
- Concrete and Stone: I usually reach for a mild mixture of dish soap and water, using a soft-bristle brush to scrub away algae and dirt. For extra stubborn lichen or green patches, a solution of half white vinegar and half water can help, but it’s important to rinse well afterward to avoid acid damage. For really old statues, I skip pressure washers; they can wear down details.
- Metal (Bronze, Iron, Aluminum): A mix of warm water with just a bit of mild dish soap works for most cleaning. Rust spots on iron might get a gentle scrub with steel wool, but I’m careful not to overdo it. For bronze, there are special bronze cleaners you can find at most garden centers or online, but a touch of lemon juice on a cotton cloth also does a nice job on tarnish.
- Resin or Plastic: These statues clean up well with just soap and water. Harsh cleaners or anything abrasive usually leave scratches, so I stick with sponges. Any mildew or mold spots generally wipe right off with a water and vinegar solution.
- Terra Cotta: For these, I keep it simple with plain water and a gentle scrub. Anything else can soak too far in or stain the clay.
Whatever your statue is made of, it’s super important to test any cleaner in a tiny spot first. I’ve avoided a lot of headaches this way, since even “natural” cleaners can stain or etch certain surfaces. In general, when in doubt, mild is best. And always rinse thoroughly with fresh water when you’re done so there’s nothing left behind to attract more dirt or cause damage later.
It’s always smart to check local guidelines for water runoff when cleaning statues outdoors. Avoid harsh chemical cleaners that might harm your lawn, flowers, or water features. Biodegradable cleaners are easier on the environment and your plants, making them a good choice for frequent garden projects.
Expert Tips and Stories from Garden Statue Restore Lovers
Here are a few firsthand insights from people who love working on these outdoor fixtures:
Angela – Concrete Cherubs
Angela spent weeks carefully patching cracks and repainting classic garden cherubs for her family yard. Her favorite trick? “A toothbrush and diluted vinegar make quick work of green slime around the base. For paint, I buy weather resistant acrylics that last for years outside.”
Jorge – Metal Fountains
Jorge, a backyard DIYer, restores yard fountains as a hobby. He prefers using a mixture of baking soda paste for spot-scrubbing stains and a special sealant designed for metals. “Every spring, I check for rust around tricky seams. If I catch it early and paint with a metal primer, my fountains sparkle all summer.”
Samira – Resin Gnomes
Samira tackles resin figurines. Her tip is simple: “Don’t use anything rough on resin. I clean mine with a damp microfiber cloth and a drop of soap. Scuffs come off with a magic eraser, but I go gently to avoid dulling the finish.”
Everyone seems to agree: patience always pays off, and gentle cleaning is better than trying to rush the process. Don’t underestimate the value of taking before-and-after photos, as well. Comparing your handiwork at each stage is a real motivational boost and a great way to measure your progress over time.
Common Challenges in Garden Statue Restoration
- Deep Stains and Growth: Moss, algae, and black mildew stains can sometimes get deep into concrete or stone statues. I’ve had luck soaking just the problem area in a vinegar solution and using a stiff (but not wire) brush.
- Chipped or Missing Details: Fixing a missing chunk of a statue is trickier than filling a simple hairline crack. Out door grade epoxy putty or a matching repair kit works for filling chips, but color matching the finish takes some trial and error. I keep a few shades of paint on hand to blend the repair for a seamless look.
- Old Paint or Rust Layers: Layers of flaking paint are best removed with a scraper and light sanding, but only after checking there’s no lead paint involved. For rusty metal, I use a rust converter if I can’t remove everything.
- Brittle or Fragile Statues: Some old statues get crumbly with age, especially if they’ve faced repeated freezes and thaws. I avoid heavy scrubbing and support the piece with towels while cleaning or patching.
Sometimes, garden statues arrive with odd surprises tucked inside. I once opened up the base of a hollow concrete rabbit and found a mouse nest. Another time, I spotted a family of snails tucked into the crevices of a cracked terracotta goddess. Always do a check for critters before you get started; you might be surprised who’s moved in!
Troubleshooting Weird Surprises
Garden restoration teaches you to expect the unexpected. Whether it’s hidden nests or unpredictable weather changes, it’s helpful to plan for extra time and extra patience. If you run into a tricky repair—say, an internal crack or really tough rust—it can be worth asking someone with more experience or taking the piece to a local shop specializing in restoration. Don’t be shy about tapping into community resources or online groups for guidance when facing a truly strange issue.
Modern Solutions Meet Traditional Methods
Technology makes some parts of restoration easier. These days, I can color match paints using an app on my phone and even order specialty fillers online that set up in just a few minutes. Still, the classic methods, like hand scrubbing, careful patching, and slow painting, tend to give the best, long lasting results. I like to mix old-school tricks with new products to get the right finish. As restoration tools become more accessible, more people are jumping into these satisfying projects and sharing what they learn along the way.
Favorite Tools and Materials for Garden Statue Restoration
Over the years, I’ve found a few tools that earn their place in my garden shed:
- Soft Wash Brushes and Toothbrushes: These work well for scrubbing textured details without causing wear.
- Plastic and Metal Putty Knives: Good for applying filler or scraping flaking paint without gouging surfaces.
- Outdoor Epoxy and Concrete Fillers: Make patching cracks or holes much simpler, especially with heavy statues.
- Weather resistant Paints (Acrylic or Enamel): These last longer on outdoor statues and can be mixed for the right match.
- Protective Sealers and Waxes: Topcoat finishes keep water out and color strong through the seasons.
- Microfiber Cloths: Wipe off residue and dry freshly washed statues in no time.
Choose your tools and products based on your statue’s material. Avoid wire brushes and harsh chemicals for anything delicate; I keep those away from everything except the toughest old iron. Disposable gloves help keep your hands cleaner and make it easy to switch between painting and patching, while painter’s tape is useful for masking off edges or protecting delicate details during repairs.
How to Get Started with Your Own Garden Statue Restoration
- Pick a Practice Project: Start on something small and lows takes. A thrift store gnome or chipped concrete critter is perfect for honing your skills before tackling a family heirloom.
- Clean First, Repair Second: Cleaning always comes first. You’ll see cracks and problem spots more clearly once the dirt and algae are gone.
- Start Simple with Repairs: For beginners, try using premixed patching products and acrylic outdoor paints—they’re user friendly and forgiving.
- Take Breaks to Let Things Set: Whether it’s filler, paint, or sealer, giving each step enough time ensures a more durable finish.
- Learn from Others: There are tons of online forums, short courses, and YouTube videos showcasing restoration tricks. I’ve picked up plenty of good ideas by checking out what other folks use for their favorite outdoor pieces.
- Document Your Work: Take progress photos at each stage. Not only does this give you a visual record of your success, but sharing your work online can help others in the restoration community and bring a bit of encouragement when you hit a tricky patch.
Frequently Asked Questions
Q: How do I safely clean a really old stone statue?
A: Stick to soft brushes and mild soap. Avoid using a power washer or harsh chemicals, since old stone can be sensitive. If any area feels crumbly, clean around it gently and consider professional advice if it feels unstable.
Q: Can I use bleach on mossy garden statues?
A: Bleach can harm some materials and kill off surrounding plants, so I usually avoid it. Vinegar is safer, as long as it’s rinsed well and used only for spot cleaning. For terracotta and more delicate pieces, stick with water and elbow grease.
Q: What’s the best way to repaint a faded statue?
A: After thorough cleaning and any needed repairs, use paint labeled as out door safe (acrylic or enamel). Two light coats work better than one thick one. For statues with lots of details, thin brushes help keep lines neat, and sealing at the end helps protect paint from sun and rain.
Q: How can I protect my restored statue from weather damage?
A: Use a high quality outdoor sealer appropriate for your statue’s material. Place statues on a solid base or pavers to keep moisture from soaking in from below. If winters are harsh where you live, consider bringing smaller statues indoors or covering them to prevent freeze-thaw cycles from causing cracks.
Why Garden Statue Restoration is Worth the Effort
Restoring a garden statue is about way more than fixing cracks or brightening faded colors. Each piece holds a little story—a memory, a gift, a lucky flea market score—and giving it a new life brings that story forward. With a handful of the right tools, some gentle cleaners, and a dose of patience, it’s totally possible to save an old favorite and watch it make your garden look amazing again. Whether you’re hoping to keep a piece in the family for another generation, add personality to your outdoor space, or simply enjoy the process, restoring garden statues is a fun and rewarding adventure that leaves your yard sparkling with charm.
I’m currently helping a friend redesign her backyard, and we’ve been debating whether to restore some old statues she already has or replace them completely. Reading your post makes me want to try restoration first; it sounds so rewarding to bring the originals back to life!
I’m curious, though, have you ever had a statue that was too damaged to restore and had to repurpose it instead? And do you have any tips for making restored pieces blend well with newer landscaping elements?