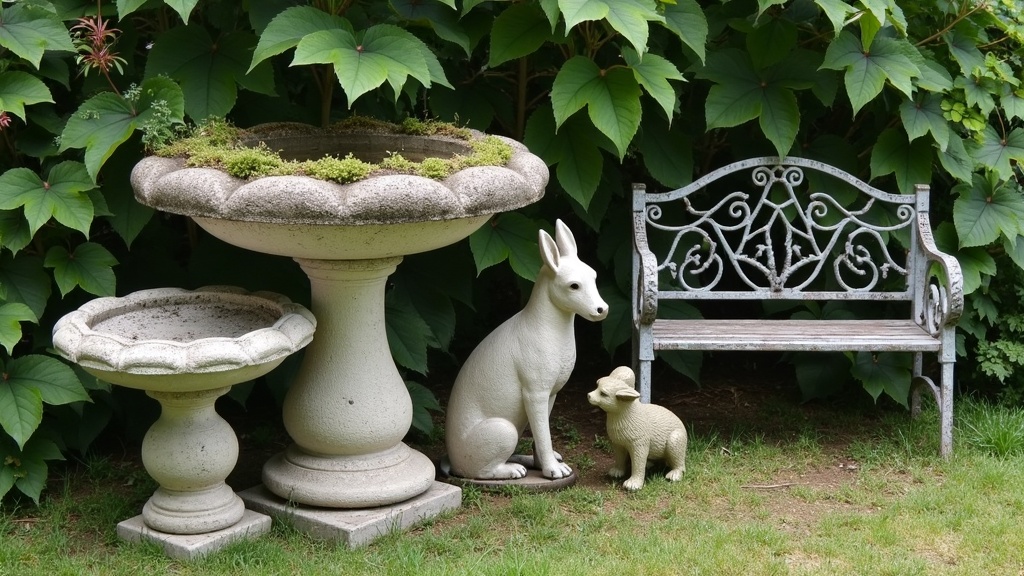
Vintage garden ornaments can add loads of charm to any outdoor space. However, after decades facing the elements, these treasures can look a bit worse for wear. Whether you’ve picked up an old stone birdbath at a flea market or inherited an iron bench that’s seen better days, sprucing up these ornaments is totally doable at home. I’ve tried loads of approaches and picked up a few tricks worth passing along. Here’s my straightforward guide to cleaning and restoring vintage garden ornaments so you can give a boost to your yard and enjoy these special pieces even longer.

Why Restoring Vintage Garden Ornaments Matters
Restoring vintage garden ornaments goes far beyond simply keeping the garden tidy or looking neat. Many of these pieces feature intricate designs and craftsmanship that’s hard to find in newer items. Taking time to care for older ornaments also slows down the effects of weather, which means you can continue to enjoy them for years. If you appreciate the feel of classic gardens or want a dash of character in your outdoor space, giving attention to these beautifully crafted objects is an easy and rewarding project.
Pieces like stone urns, cast iron statues, or concrete animals have been popular since Victorian times. It’s common to stumble upon them covered in moss, lichen, or peeling paint, but underneath, the original details are often still intact. With patience, elbow grease, and the right steps, you’ll be amazed at the transformation—those lost details can make an ornament eye-catching once again.
Understanding Common Types of Vintage Garden Ornaments
Older garden ornaments come in a variety of materials, each with unique cleaning and restoration needs:
- Stone and Concrete: Tend to collect weathered surfaces, moss, and stubborn stains.
- Cast Iron: Rust and old paint call for special care.
- Terracotta: May suffer from cracks, chips, and salt stains.
- Lead and Bronze: You’ll sometimes spot tarnish or tricky mineral buildup.
It’s helpful to know the material you’re working with so you can choose safe cleaning supplies and avoid accidental harm.
Prep Work: Cleaning Old Dirt and Growth
Nearly every vintage ornament you find will arrive with years of dirt, moss, algae, and lichen. Before thinking about repairs or painting, it’s vital to start with a solid cleaning to reveal what lies beneath. Here’s my top cleaning method for restoring vintage garden ornaments:
- Brush Off Loose Dirt: A stiff plastic brush works perfectly. A metal brush is usually too harsh and may scratch or wear away detail.
- Soak if Needed: For stubborn buildup, soak the ornament with the garden hose or in gentle soapy water for about 10–20 minutes. This helps loosen grime without scrubbing too hard.
- Scrub Gently: Using mild dish soap and a sponge or soft brush, clean the surface. For stone pieces, be sure to use a soap without harsh chemicals.
- Tackle the Moss and Lichen: Gently scrape thick moss by hand, then apply a mix of white vinegar and water (about 1:1) to lingering green areas. Let it sit for a few minutes, then give it a rinse.
Avoid pressure washers unless the ornament is sturdy enough; most old stone and terracotta can’t handle the force, as they chip easily. If you notice cracks or loose pieces, scrub with extra care and avoid heavy pressure.
Restoring Materials: Repair and Protection
Once everything’s clean, you’re ready to look for places that need a bit of fixing. Here’s how I approach the most common ornament materials:
Stone and Concrete
If you spot small chips or surface cracks, stone epoxy or a concrete patch can work wonders. Apply a small amount and wipe away any extra while it’s still soft. For bigger gaps, concrete filler works best. Broken-off pieces usually can be held in place with strong adhesive and clamped until fully set.
Cast Iron
Rust is common on cast iron benches and statues. Light rust comes off with a wire brush and fine steel wool, while stubborn spots might need a garden-safe rust remover gel. After removing rust, use a rust-blocking primer and follow up with spray paint made for outdoor metal. Paint in thin layers outdoors and allow plenty of time for drying between coats.
Terracotta
Hairline cracks are often fixable with clear epoxy resin. Small chips can be filled with a special terracotta repair kit or a mix of powdered terracotta and waterproof glue. For white salt stains, diluted vinegar can clean them off, but always rinse well and don’t overdo it, as vinegar can make terracotta brittle if used too much.
Lead and Bronze
For these metals, gentle cleaning is your best plan. Mix up a paste of baking soda and water, and rub it in with a sponge. For bronze, a tiny bit of mineral oil can help details stand out without making it overly shiny, letting you keep that classic patina. Avoid polishing them back to a bright finish; a subtle, authentic glow looks much better.
Priming and Painting (If Needed)
Not every ornament needs a new coat of paint, but painting adds protection and can make faded items look next-level cool. For cast iron and concrete, a few layers of outdoor primer and exterior-grade paint help extend their life. It’s key to stick with paints labeled for garden or masonry use—you’ll get a much longer-lasting result.
- For wrought iron: Use rust-blocking primers and metal paint.
- For concrete: Go with masonry paint, brushing on thin, even coats.
- For terracotta: Only paint if necessary; if it’s a planter or fountain, seal the inside with a waterproofing product instead of painting the outside.
Always wait for the ornament to dry fully before painting. Working in the shade helps keep paint from drying too fast and possibly cracking.
Extra Touches: Sealing, Placement, and Ongoing Care
After everything is clean, fixed, and painted (if you wish), sealing your restoration work offers lasting protection. I often use a clear masonry sealer for stone and concrete, and a clear metal sealer spray for iron. Apply outside in a well-ventilated spot and use gloves and a mask.
Placement is important, too. Try to keep your restored pieces out of spots where leaves and water collect, like under heavy shrubs or low-hanging trees. Lifting benches or statuary on a few paving stones keeps them away from damp soil, reducing the risk of new stains or moss.
Twice a year—usually spring and fall—I give all my ornaments a quick wipedown, checking for new rust, cracks, or moss. Ongoing light maintenance can really extend the fresh look and save you from major cleanups down the line.
Common Issues and Easy Fixes
- Efflorescence (white powder on stone/concrete): Brush it off dry, then use diluted vinegar for cleaning. Rinse thoroughly when finished.
- Persistent algae stains: Scrub with a gentle bleach solution. Always wear gloves and rinse the area very thoroughly.
- Loose parts: Replace old bolts or joints with stainless hardware and tighten up connections.
- Chipped paint: Sand lightly and use a small brush for touch-ups. Apply thinly to avoid drips.
If you find something particularly tricky—like a lead ornament with big cracks or a rare antique—ask a restoration expert before making repairs. Extra care helps keep their value intact.
Frequently Asked Questions
Question: Can I use household cleaners on old garden ornaments?
Answer: Most of the time, mild, eco-friendly dish soap is safe for cleaning. Avoid harsh chemicals or bleach unless you’re sure the material will not react badly. Test any product on a small patch first.
Question: Is pressure washing okay on concrete or stone ornaments?
Answer: It’s usually not a good idea, especially with older or porous materials, as it can damage detailing or cause cracks. I stick to gentle hoses or soft brushes for best results.
Question: How should I store ornaments in winter?
Answer: In areas with lots of freezing and thawing, move fragile or hollow pieces to a garage or shed. For heavier stone and iron ornaments, cover loosely with a breathable fabric or tarp to guard against excess moisture.
Key Supplies for DIY Restoration
- Soft and stiff plastic brushes
- Ecofriendly soap
- Vinegar, baking soda, and mineral oil
- Epoxy or stone/concrete filler
- Outdoor primers and paints
- Masonry or metal sealer
- Work gloves and a protective mask
I keep these essentials in a small kit, making it easy to do a quick tune-up or tackle bigger repairs when needed. With these tools and a little attention, vintage ornaments can keep your garden looking special for many years.

I found the step-by-step cleaning process you outlined for different materials is interestingly thorough – especially the distinction between gentle patina preservation versus more aggressive oxidation removal. Your warning about avoiding wire brushes on delicate lead ornaments could save many collectors from making irreversible mistakes.
Many people don’t realize that proper drying time between cleaning and sealing steps can be just as important as the cleaning itself for preventing future damage.
You mentioned using specialized wax for finished pieces – how do you determine the ideal reapplication frequency for ornaments exposed to harsh weather? And for pieces with mixed materials (like stone with metal accents), do you adjust your approach to accommodate both surfaces simultaneously?
Hey there! Richard here—welcome (and a double welcome!) to the quirky, sometimes muddy, always rewarding world of yard ornament restoration. ????✨
You nailed two of the big “quiet culprits” people overlook: drying time and mixed-material care. Skipping a proper dry can actually trap moisture under a sealer or wax, which is basically like shrink-wrapping your ornament in a raincloud—never good! A safe rule of thumb is 24 hours of drying time in mild weather (longer if it’s humid).
On wax reapplication, think of it like sunscreen for your ornaments:
High sun/rain exposure: every 3–4 months.
Moderate climates: 6 months.
Covered patios or gentler settings: once a year is usually plenty.
For mixed materials (say stone with brass inlay), I like to treat them like a blended family: each surface gets its own product, but you overlap carefully at the seams. For example, you can apply a breathable stone sealer first, let it cure, then follow with a microcrystalline wax just on the metal accents. That way, neither surface is compromised.
Fun fact: in some old European estates, caretakers used beeswax and linseed oil cocktails to protect statues with both stone and bronze details—a little historical nod to how layered protection has always been part of the art. ????️
Here is a simple Seasonal Care Calendar—think of it as a gardener’s almanac but for statues, gnomes, lions, and all the yard guardians out there. ????✨
???? Spring (refresh & prep)
All climates: Gentle cleaning after winter (dust, algae, or salt residue).
Sealing: Reapply stone/concrete sealers after a full dry spell.
Wax (metal/bronze): Apply a fresh coat before the rains start.
Tip: Check for cracks—freeze-thaw damage often shows up now.
☀️ Summer (sun defense)
Hot/dry climates: Dust off regularly, light rinse monthly. Wax touch-up if surfaces look chalky.
Humid/rainy climates: Watch for mildew—mild soap wash if needed.
Mixed materials: Re-wax metal accents mid-season; stone usually doesn’t need resealing until fall.
???? Autumn (storm prep)
All climates: Clean off fallen leaves and sap (they stain like nobody’s business).
Sealing: Ideal time for another coat on porous stone or concrete before the wet season.
Wax (metal): Reapply—especially in hurricane- or storm-prone regions.
Tip: This is when to secure bases and anchors for windy seasons.
❄️ Winter (protection mode)
Mild climates: A quick rinse & wax reapplication if rain is frequent.
Cold/freezing climates:
Ensure no water is trapped in cracks (can expand and worsen damage).
Store delicate ornaments indoors if possible.
Otherwise, give a final seal/wax in late fall, then let them hibernate outdoors.
⏱️ Frequency Snapshot (easy reference)
Cleaning: 1–4× a year (depends on climate).
Sealing (stone/concrete): Every 6–12 months.
Waxing (metal/bronze): Every 3–6 months outdoors, once a year if covered.